SUBSCRIBE! Sign up for our daily newsletter and never miss a story!

Wine Making 101: How to Get Started

Oct 15, 2021 | 3:00 AM

Have you always wanted to get into wine-making, but not sure how to get started? We’ve got good news for you! Getting started is easier (and cheaper) than you might think and fall is a great time to get started. Here are some basics to help you being your wine-making journey!

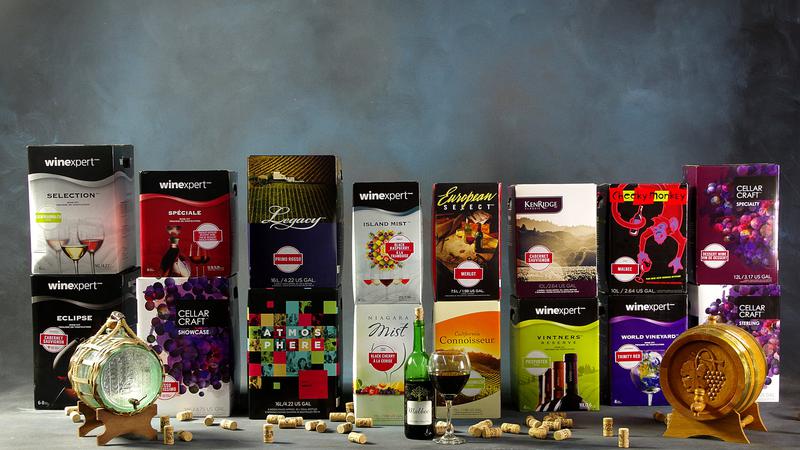
As with any other hobby, you can start with the basics and then, as you get into it, you can acquire more sophisticated tools. So to start out, your best bet is to purchase a wine-making starter kit which has all the basic gear you need to make your own wine. Of course, you’ll need something to make the wine of your choice, so either a wine kit or fruit from your backyard. If you’ve never made wine before, we recommend starting with a wine kit so that you can enjoy success without too much stress!

What’s in a Basic Starter Kit?

  • Primary Fermenter: a food-grade plastic bucket in which you start any wine whether it be a kit or a fruit wine. Note that everything you use to make wine needs to be food-grade.
  • Carboy: glass or food-grade plastic container. Getting your wine to be clear involves transferring/siphoning the wine from one vessel to another – for example, transferring from primary to carboy.
  • Racking Tube & Hose: this is used to siphon wine from one container to another. The hose has an anti-sediment tip which leaves the sediment and lees (dead yeast) behind and transfers just the clear wine. “Racking” just means moving the wine from one vessel to another.
  • Hydrometer: probably one of the most important tools in your kit, the hydrometer measures the specific gravity or sugar content of the unfermented juice (i.e. before you start the wine-making process) and is used regularly throughout the process to make sure that the sugar is being converted to alcohol.
  • Thermometer: this will help you ensure that your room and your wine are kept at the ideal wine-making temperature (about 20 degrees C).
  • Bottle Filler: this is essentially a tube with a valve at the end; it hooks up to your racking hose allowing you to easily fill your bottles.
  • Sterilant (sodium metabisulphite): used to sterilize any equipment that touches the wine – keeping things sterile is essential.
  • Stirring Spoon: a very long spoon that will reach to bottom of your vessels allowing you to thorough stir your wine.

What Other Equipment Do I Need?

While your starter kit has all the basic equipment you need to make wine, you can definitely purchase more sophisticated equipment to make the process even easier.

  • Filter Machine: used to filter the wine to achieve an even clearer, more esthetically-pleasing end product.
  • Floor Corker: to cork your bottles, you can use a simple hand-corker (which can be rather frustrating) or you can purchase a floor corker which makes like a whole lot easier.

FREE Borrowing Privileges

At Steiners, we like to help out our customers. So if you purchase your wine kit from us, we will happily lend you both a filter machine and a floor corker at no cost when you are ready to bottle your wine. Just ask and we’ll get you set up!

Wine Kits vs. Fresh Fruit

If you’re looking for an easier process and sure-fire success with your first wine-making efforts, we highly recommend going with a wine kit your first time out. You will find a wide selection at our wine boutique, from sweeter, lower-alcohol fruit-flavoured wines to table wines in white or red. Price of the kits vary depending on the type and quality.

Most kits make approx. 28-30 bottles, so regardless of the kit you purchase, you are saving yourself a lot of money and having some fun along the way!

If you are brave enough to try making wine from backyard fruit, we can definitely help you with some tips and tricks. Popular fruits are apples and grapes which of course are almost ripe. You can also pick fresh fruit in summer and freeze it to make the wine in the winter.

What Kind of Space Do I Need?

You really don’t need a big space for your wine-making. However, the most important thing is having access to water, so a kitchen, basement bar or laundry sink work well. Having a sturdy table or strong shelf to store the primary and/or carboy while the wine is being made is also a must. Your space should be kept at room temperature (about 20 degrees C).

How Long Does it Take?

The shortest kit we sell takes four weeks from beginning to end. Higher end wine kits typically take longer to make, from 6-8 weeks, for example. These are table wines that will continue to improve with ages for up to two years. Fresh-fruit wine, in our experience, can take up to a year to make and bottle.

So, are you feeling ready to give it a try? Remember, our team is here to help you along the way with any questions you might have! Happy wine-making!